How to use PyTorch Lightning's built-in TPU support
Karl Weinmeister
Head of Cloud Product DevRel
The Lightning framework is a great companion to PyTorch. The lightweight wrapper can help organize your PyTorch code into modules, and it provides useful functions for common tasks. For an overview of Lightning and how to use it on Google Cloud Platform, this blog post can get you started.
One really nice feature of Lightning is being able to train on any hardware without changing your core model code. An Accelerator API is provided with built-in support for CPU, GPU, TPU, Horovod, and more. You can even extend the API to support your own hardware.
In this blog post, we'll see how easy it is to start training models with Lightning on TPUs. TPUs, or Tensor Processing Units, are specialized ML processors that can dramatically accelerate the time to train your model. If you're new to TPUs, the blog post What makes TPUs fine-tuned for deep learning? is a gentle introduction to TPU architecture and benefits.

Google Cloud's GA support for PyTorch / XLA is the bridge between PyTorch and the TPU hardware. XLA, or Accelerated Linear Algebra, compiles high level operations from your model into operations optimized for speed and memory usage on the TPU. PyTorch XLA Deep Learning Containers are available at gcr.io/deeplearning-platform-release/pytorch-xla, preconfigured with everything you need to use PyTorch on TPUs.
Now that we've introduced the concepts, let's walk through how to get started. We will demonstrate how to setup the Cloud infrastructure, a notebook instance that is connected to a TPU node. Then, we will show how to use this TPU node in our training from PyTorch Lightning.
Setup your notebook instance
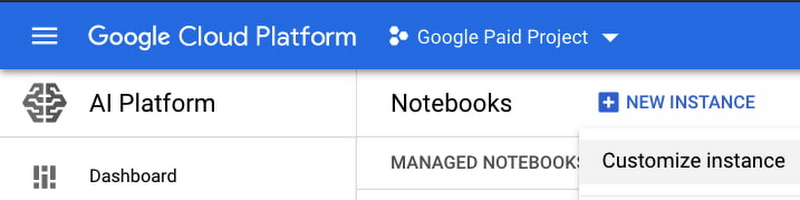
The first step is setting up the notebook instance. From the Cloud Console, go to AI Platform > Notebooks. Select New Instance, then Customize instance, so that we can provide more specific configuration details.
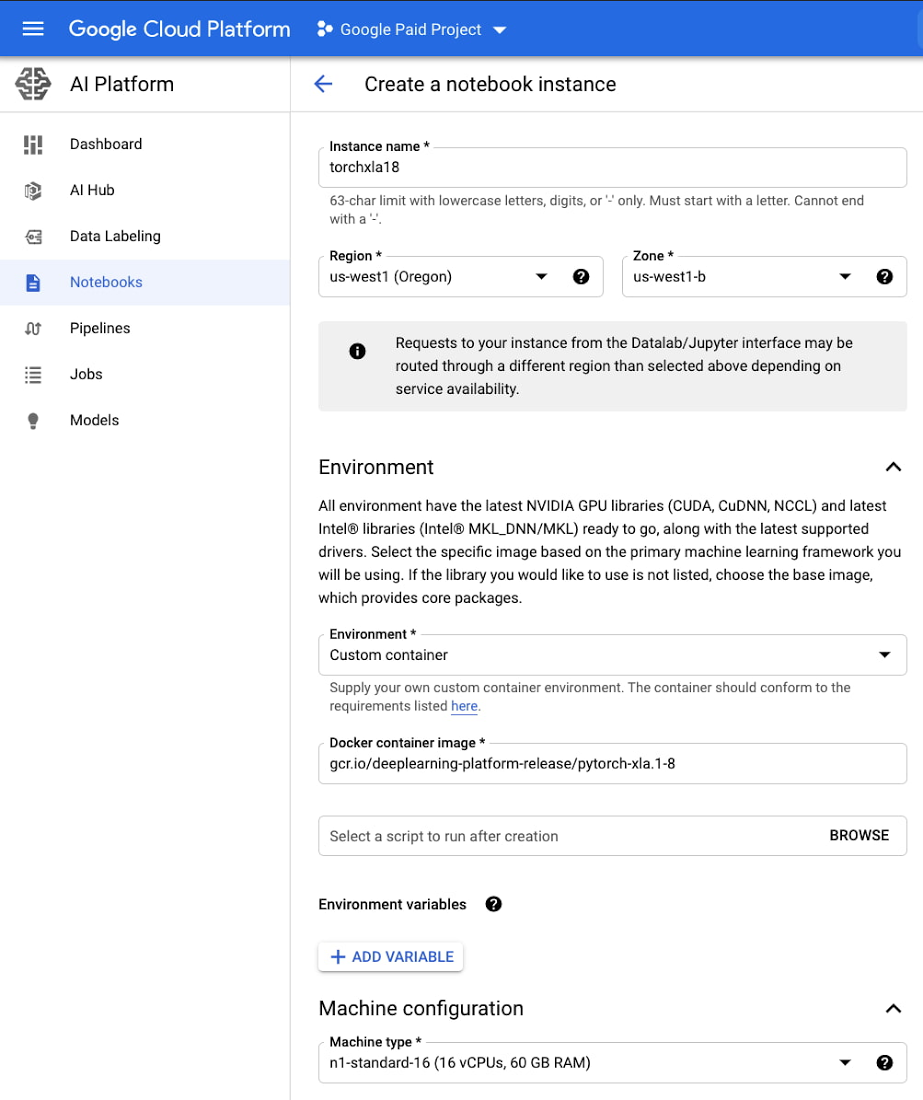
Next, select a region and zone. After that, the key inputs are:
Environment: Custom container
Docker container image: gcr.io/deeplearning-platform-release/pytorch-xla.1-8
Machine configuration: n1-standard-16
Select CREATE to begin provisioning your notebook instance.
If newer PyTorch XLA images are available, you can feel free to use those. Just make sure that the version matches the version of the TPU node that we'll create next. You can browse available images at gcr.io/deeplearning-platform-release.
After the notebook has been provisioned, select OPEN JUPYTERLAB to access the JupyterLab environment. If you'd like to access the sample for this tutorial, you can open a new terminal (File > New > Terminal), and then run:
cd /home/jupytergit clonehttps://github.com/GoogleCloudPlatform/ai-platform-samples
The left sidebar will refresh after a few moments. You'll find the sample within ai-platform samples > notebooks > samples > pytorch > lightning.
Setup your TPU node
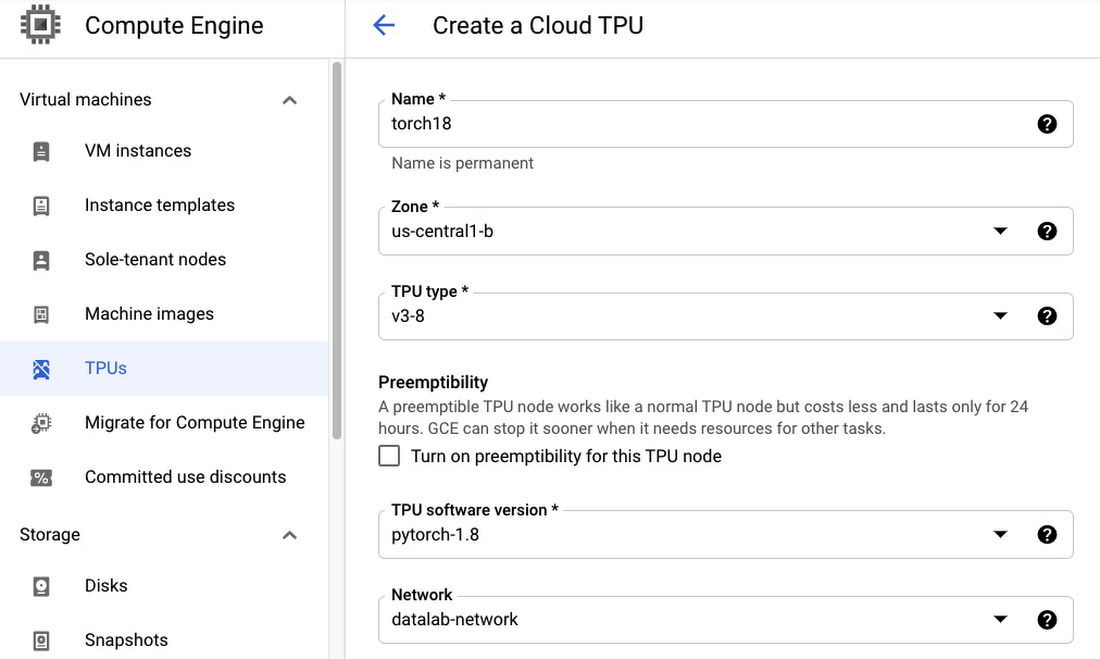
Next, let's provision a TPU node that we can use from our notebook instance. From the Cloud Console, go to Compute Engine > TPUs. Select Create TPU Node, and then choose a name of your choice. Then, select a Zone and TPU type, keeping in mind that TPU availability varies per region.
Make sure to select a TPU software version that matches the version you selected for your notebook, in this case pytorch-1.8. Also, for the purposes of this tutorial, select datalab-network for the Network, so that you can access your TPU directly from the notebook instance without configuring any networking settings.
Connect your notebook instance to the TPU node
After your TPU has been provisioned, go back to the sample notebook. There are a couple optional cells for TPU configuration that you can uncomment. Let's walk through these.
First, let's check the IP address of the Cloud TPU you created. Make sure to update --zone with your TPU zone.
Make note of a couple items here:
ACCELERATOR_TYPE: v3-8 tells us the TPU type and number of cores. In this case, we created a v3 with 8 cores.NETWORK_ENDPOINTS: we'll need to include this IP address in an environment variable, so that we can communicate with the TPU node. You can set this variable in the sample notebook, and this it will be exported in this line:
Basically, exporting that one environment variable is all that's required!
Training your model with TPUs
Lightning helps you organize your PyTorch code by extending classes such as LightningModule and LightningDataModule. The model code contained with your LightningModule can be reused across different types of hardware.
The Lightning Trainer class manages the training process. Not only does it handle standard training tasks such as iterating over batches of data, calculating losses, and so on, it takes care of distributed training! It uses a PyTorch DistributedDataSampler to distribute the right data to each TPU core. It also leverages PyTorch's DistributedDataParallel strategy that replicates the model across each core, passes in the appropriate inputs, and manages gradient communication between each core.
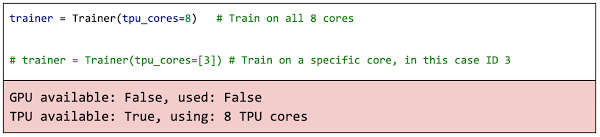
When creating the Trainer, you can use the tpu_cores argument to configure TPU support. You can either pass in the number of TPU cores or a specific core you'd like to use:
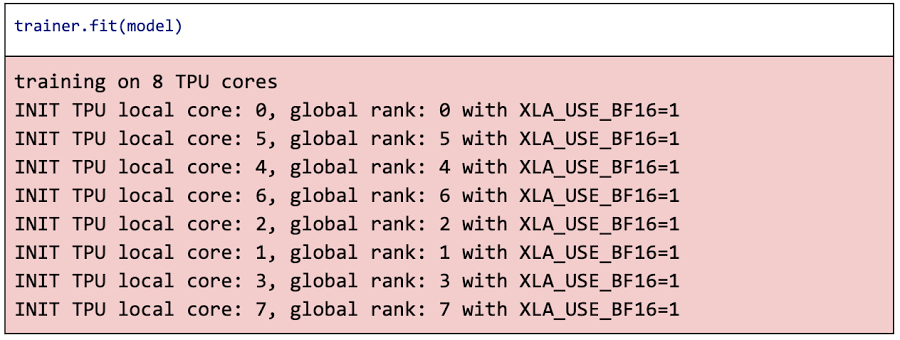
You can use the Brain Floating Point Format, or bfloat16, by setting the environment variable XLA_USE_BF16=1. bfloat16 has worked as well as the 32-bit floating point format in practice, while reducing memory usage and increasing performance. For more details, see this blog post: BFloat16: The secret to high performance on Cloud TPUs.
You will then have a trained PyTorch model that you can use for inference, or to save to a model file for production deployment. You'll see how to do that and more in the sample notebook, which you can directly open in AI Platform Notebooks.
In this blog post, we've seen how PyTorch Lightning running on Google Cloud Platform makes training on TPUs a breeze. We showed how to configure a TPU node and connect it to a JupyterLab notebook instance. Then, we leveraged standard PyTorch distributed training across TPU cores, by using the same, reusable model code that works on any hardware. With the power of TPUs at your fingertips, what will you solve next?