Serve a TensorFlow Hub model in Google Cloud with Vertex AI
Dale Markowitz
Applied AI Engineer
Good artists copy, great artists steal, and smart software developers use other people’s machine learning models.
If you’ve trained ML models before, you know that one of the most time-consuming and cumbersome parts of the process is collecting and curating data to train those models. But for lots of problems, you can skip that step by instead using somebody else’s model that’s already been trained to do what you want--like detect spam, convert speech to text, or label objects in images. All the better if that model is built and maintained by folks with access to big datasets, powerful training rigs, and machine learning expertise.
One great place to find these types of “pre-trained” models is TensorFlow Hub, which hosts tons of state-of-the-art models built by Google Research that you can download and use for free. Here you’ll find models for doing tasks like image segmentation, super resolution, question answering, text embedding, and a whole lot more. You don’t need a training data set to use these models, which is good news, since some of them are huge and trained on massive datasets. But if you want to use one of these big models in your app, the challenge then becomes where to host them (in the cloud, most likely) so they’re fast, reliable, and scalable.
For this, Google’s new Vertex AI platform is just the ticket. In this post, we’ll download a model from TensorFlow Hub and upload it to Vertex’s prediction service, which will host our model in the cloud and let us make predictions with it through a REST endpoint. It’s a serverless way to serve machine learning models. Not only does this make app development easier, but it also lets us take advantage of hardware like GPUs and model monitoring features built into Vertex. Let’s get to it.
Prefer doing everything in code from a Jupyter notebook? Check out this colab.
Download a model from TensorFlow Hub
On https://tfhub.dev/, you’ll find lots of free models that process audio, text, video, and images. In this post, we’ll grab one of the most popular Hub models, the Universal Sentence Encoder. This model takes as input a sentence or paragraph and returns a vector or “embedding” that maps the text to points in space. These embeddings can then be used for everything from sentence similarity to smart search to building chatbots (read more about them here).
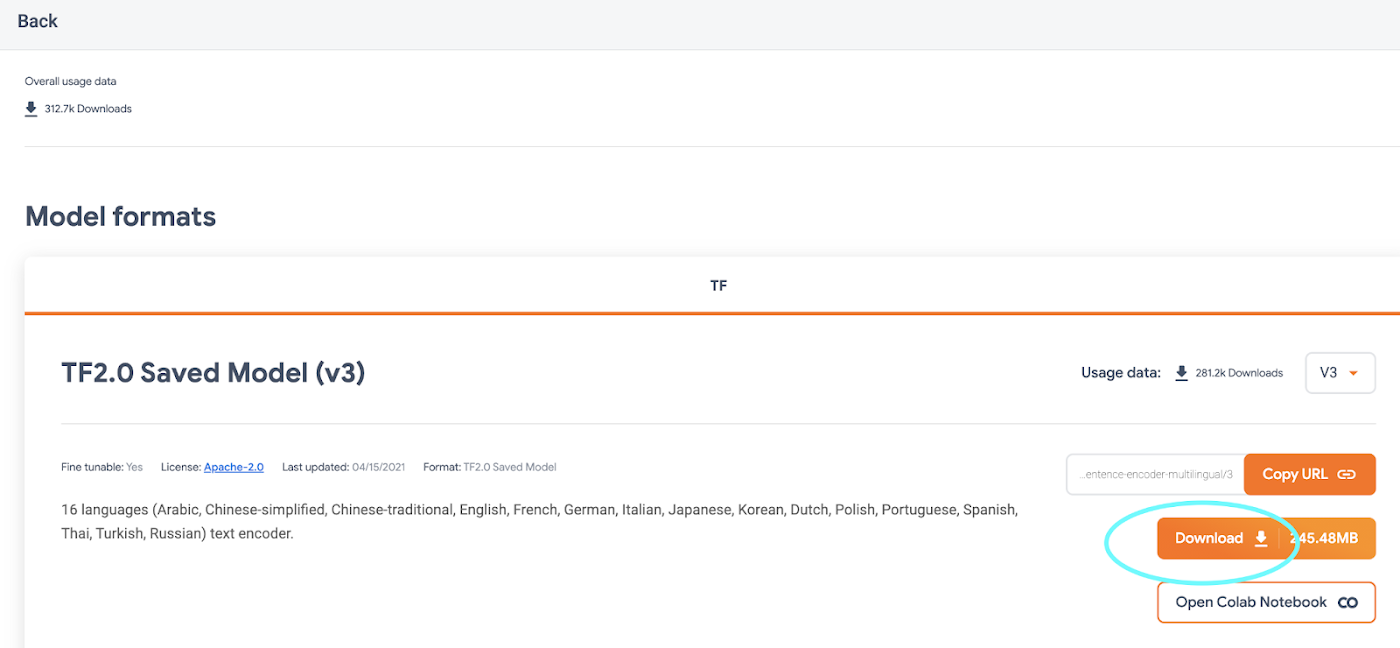
On the Universal Sentence Encoder page, click “Download” to grab the model in TensorFlow’s SavedModel format. You’ll download a zipped file that contains a directory formatted like so:
-universal-sentence-encoder_4-assets
-saved_model.pb
-variables
- variables.data-00000-of-00001
- variables.index
Here, the saved_model.pb file describes the structure of the saved neural network, and the data in the variables folder contains the network’s learned weights.
On the model’s hub page, you can see it’s example usage:
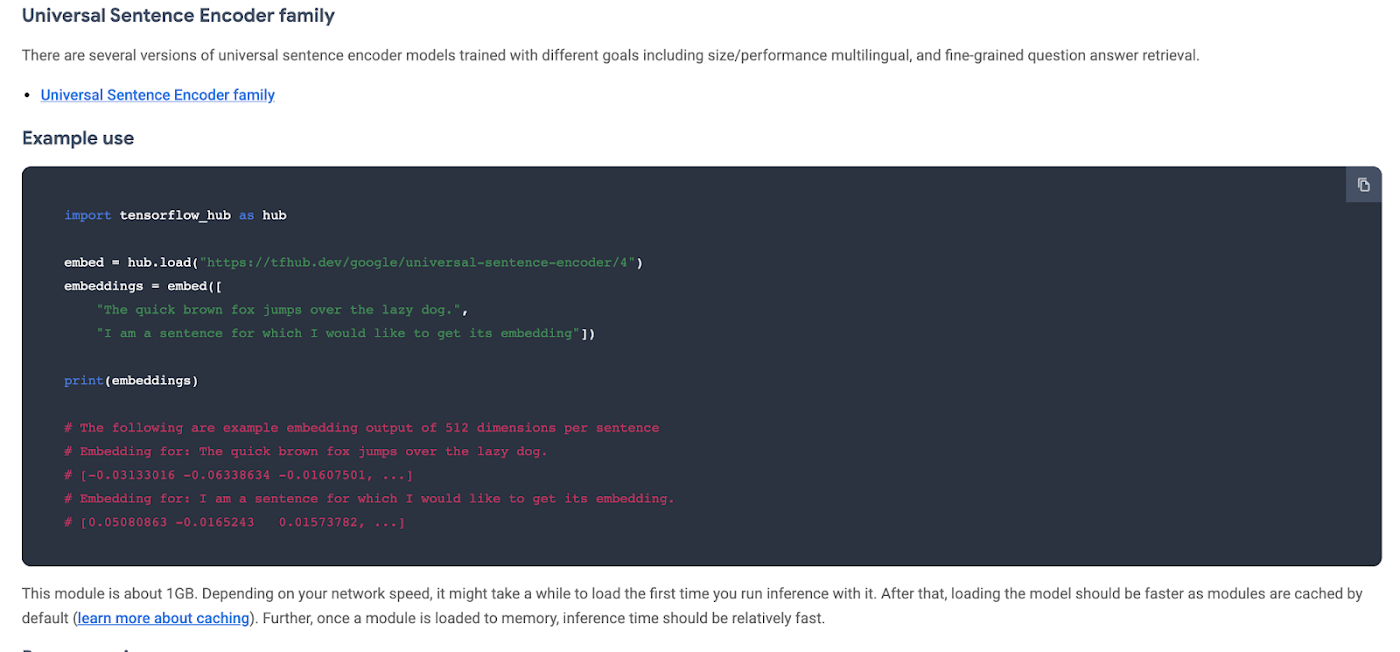
You feed the model an array of sentences and it spits out an array of vectors.
Without this example, we can still learn about what input and output the model supports by using TensorFlow’s SavedModel CLI. If you’ve got TensorFlow installed on your computer, in the directory of the Hub model you downloaded, run:
For this model, that command outputs:
From this, we know that our model expects as input a one-dimensional array of Strings. We’ll use this in a second.
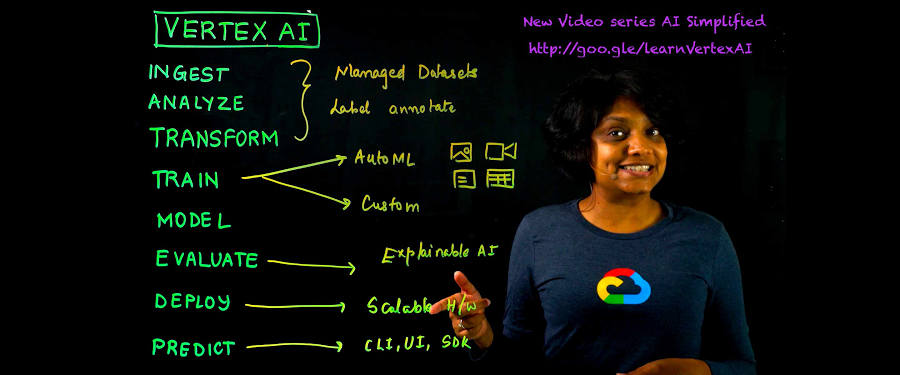
Getting started with Vertex AI
Vertex AI is a new platform for training, deploying, and monitoring machine learning models launched this year at Google I/O.

For this project, we’ll just use the prediction service, which will wrap our model in a convenient REST endpoint.
To get started, you’ll need a Google Cloud account with a GCP project set up. Next, you’ll need to create a Cloud Storage bucket, which is where you’ll upload the TensorFlow Hub model. You can do this from the command line using gsutil:
If this model is big, this could take a while!
In the side menu, enable the Vertex AI API.
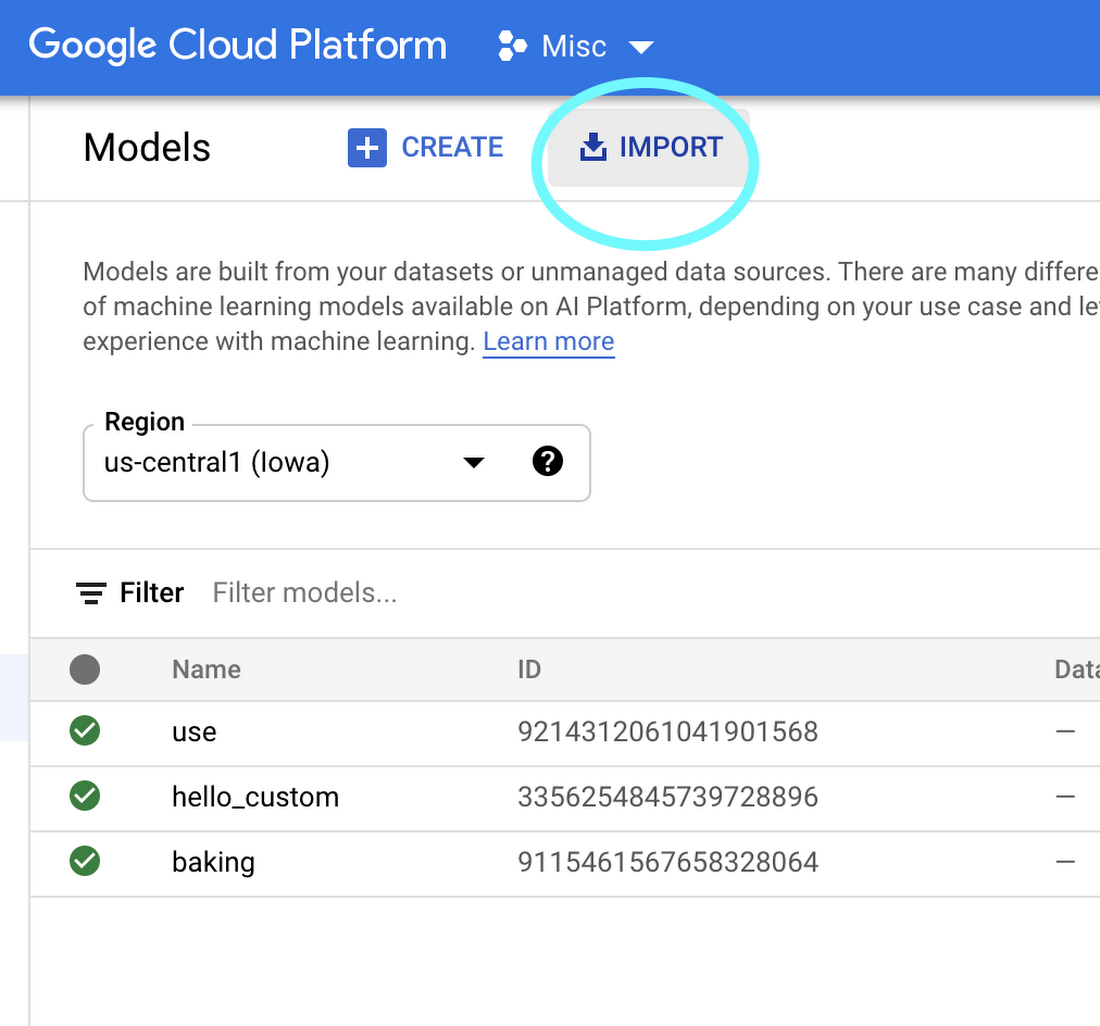
Once your Hub model is uploaded to Cloud Storage, it’s straightforward to import it into Vertex AI following the docs or this quick summary:
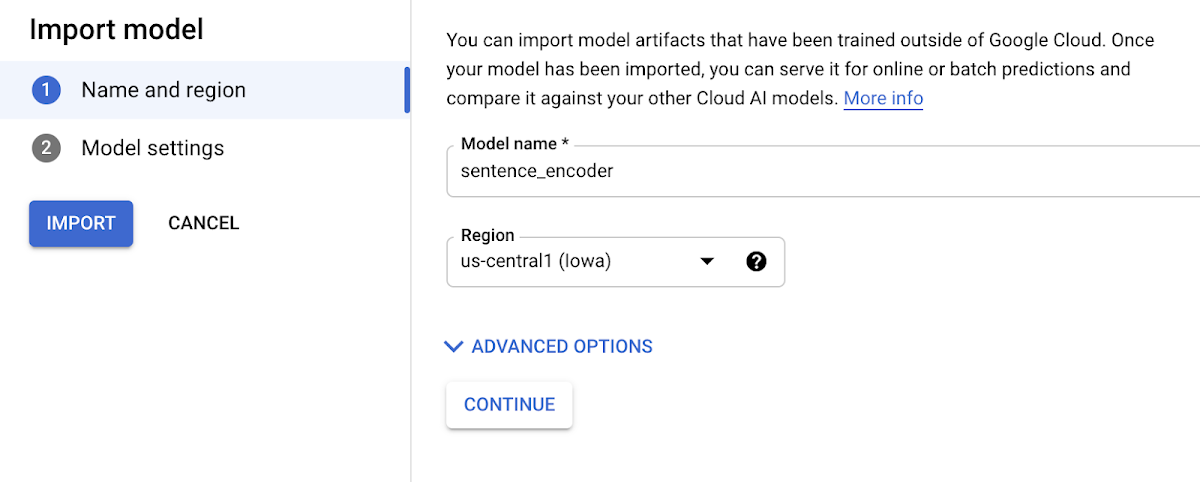
On the Vertex AI “Models” tab, click import:
2. Choose any name for your model:
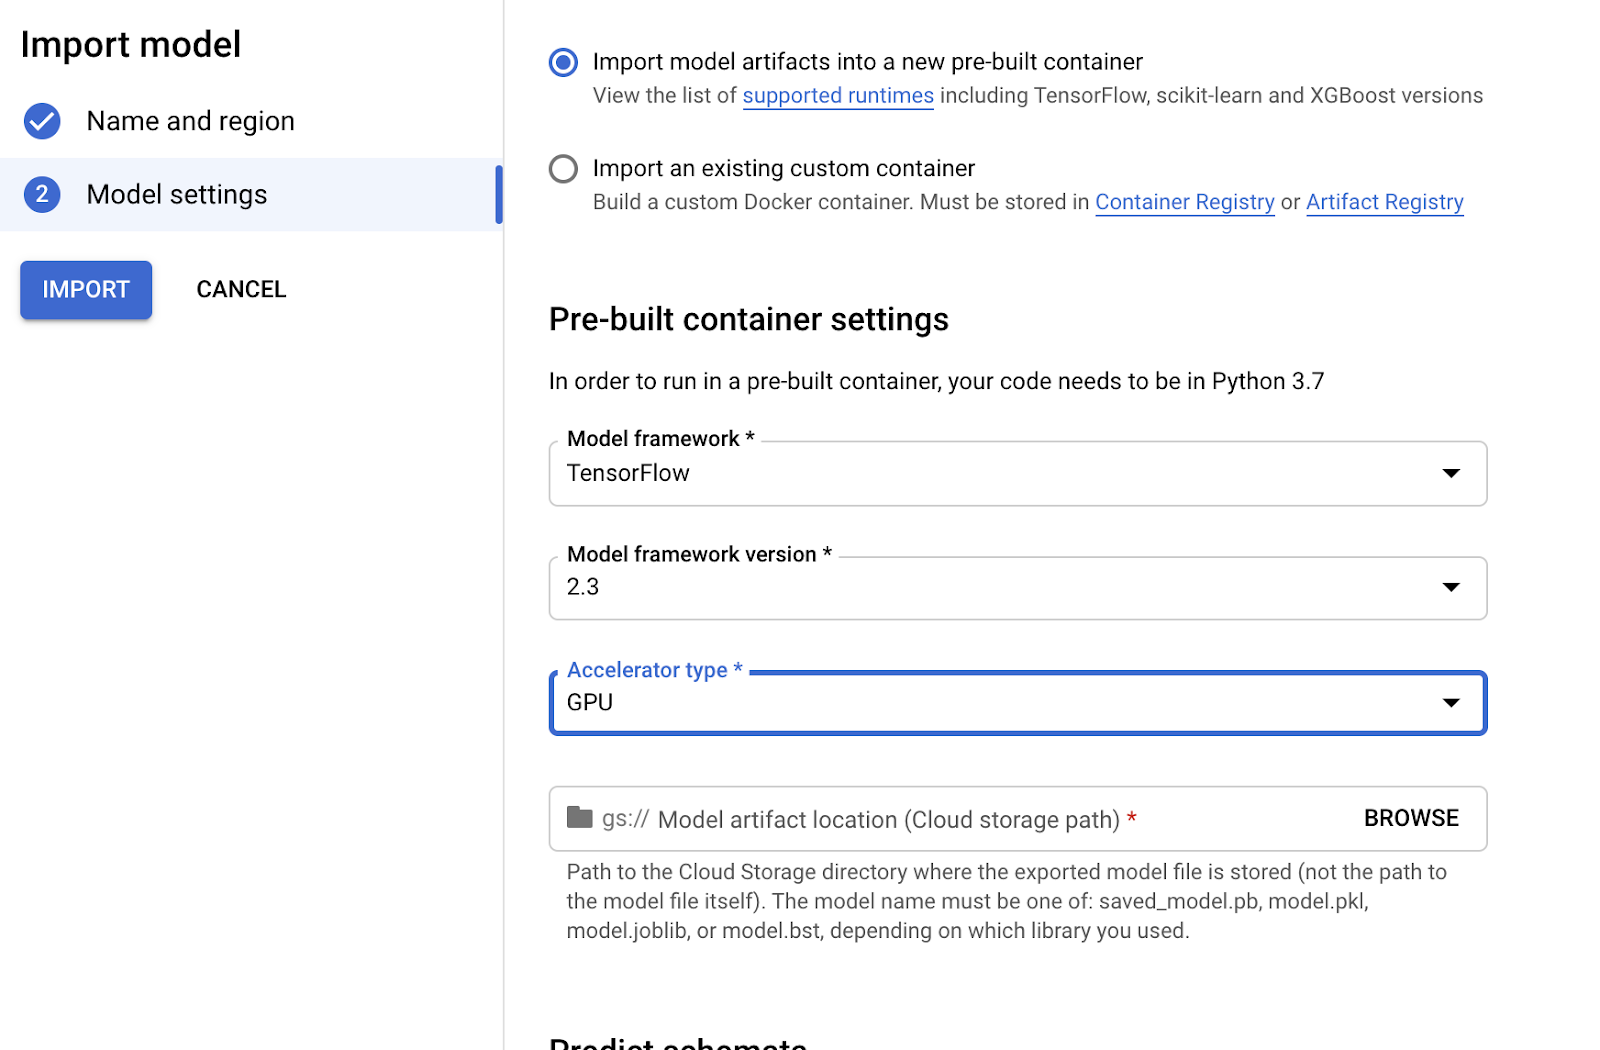
3. Choose a compatible version of TensorFlow to use with your model (for newer models, >= 2.0 should work). Select “GPU” if you want to pay for GPUs to speed up prediction time:
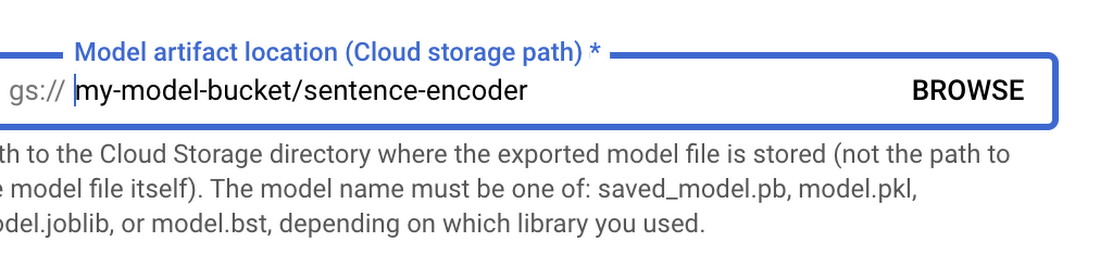
4. Point “Model artifact location” to the model folder you uploaded to Cloud Storage:
5. Click “Import.”
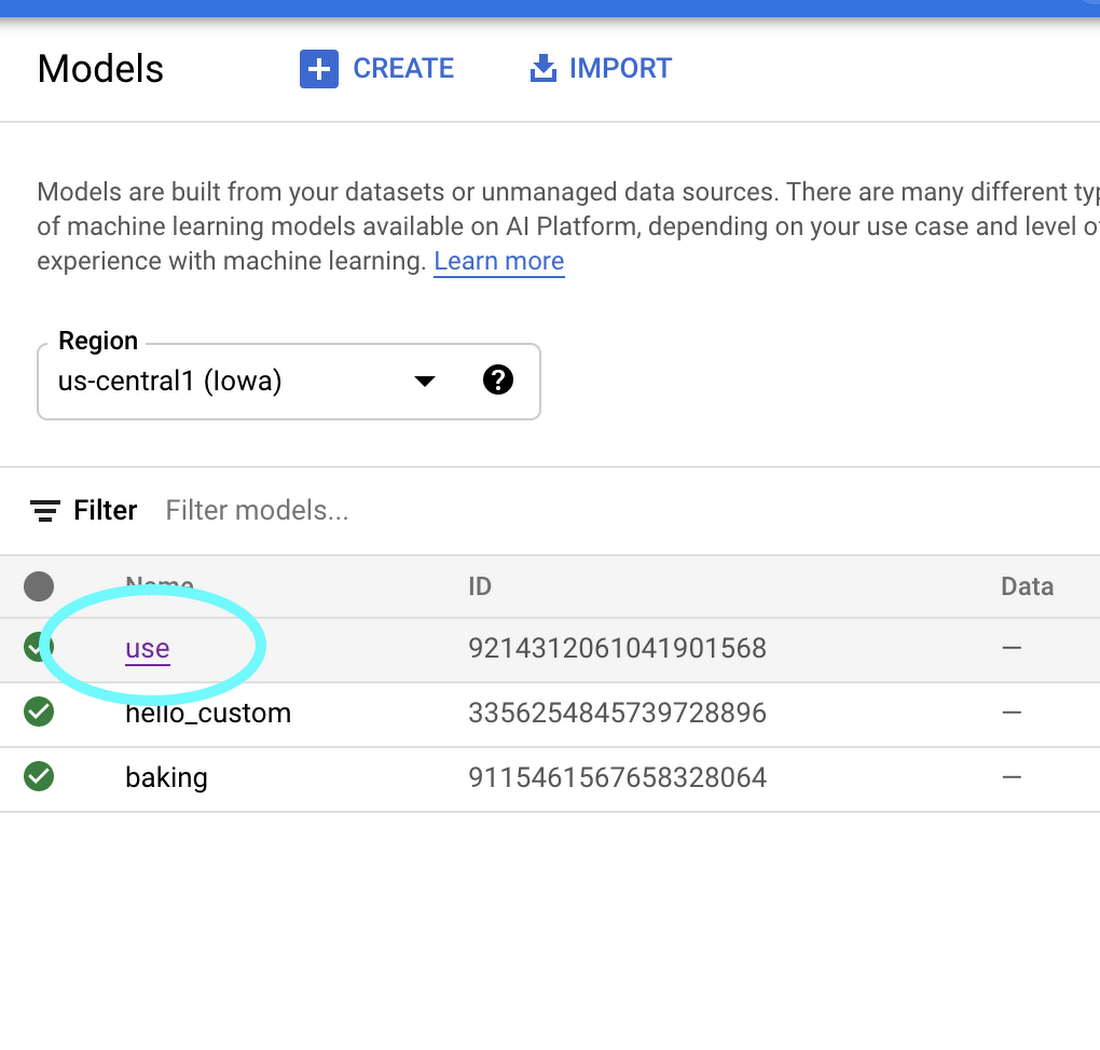
6. Once your model is imported, you’ll be able to try it out straight from the models tab. Click on the name of your model:
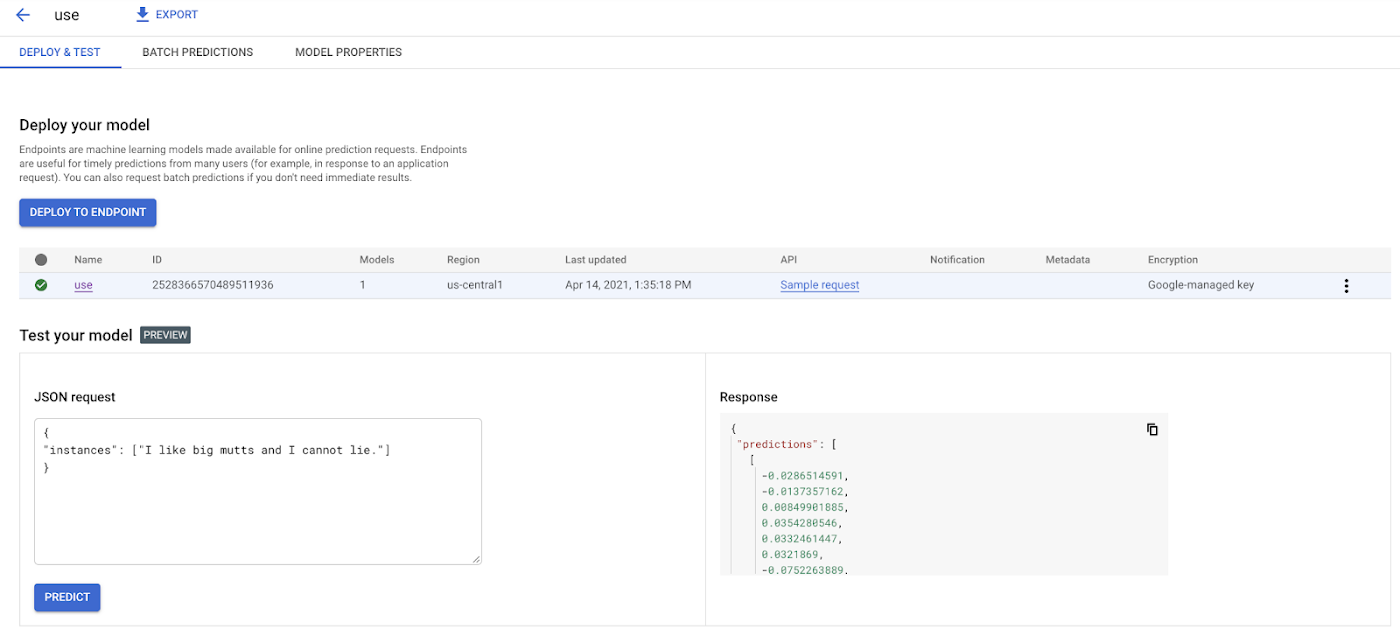
7. Here in the model page, you can test your model right from the UI. Remember how we inspected our model with the saved_model_cli earlier and learned it accepted as input an array of strings? Here’s how we can call the model with that input:
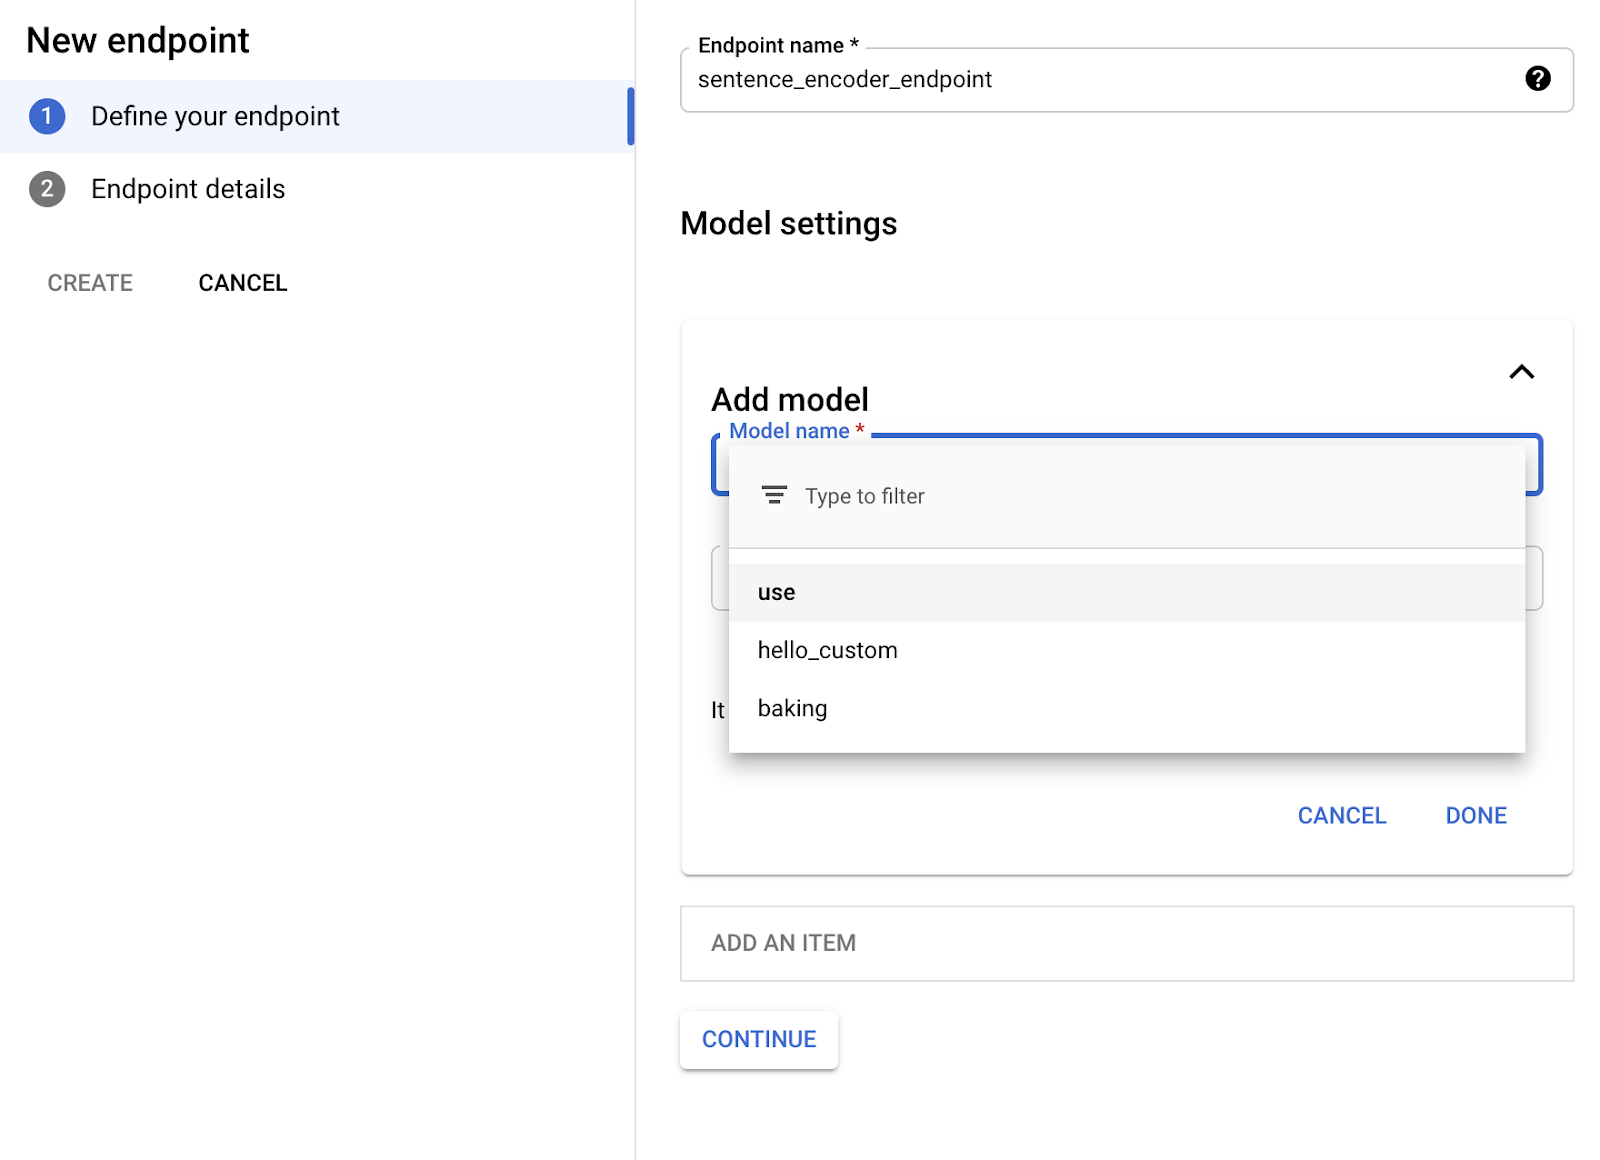
8. Once you’ve verified your model works in the UI, you’ll want to deploy it to an endpoint so you can call it from your app. In the “Endpoint” tab, click “Create Endpoint” and select the model you just imported:
9. Voila! Your TensorFlow Hub model is deployed and ready to be used. You can call it via POST request from any web client or using the Python client library:
Now that we’ve set our TensorFlow Hub model on Vertex, we can use it in our app without having to think about (most of) the performance and ops challenges of using big machine learning models in production. It’s a nice serverless way to get building with AI fast. Happy hacking!